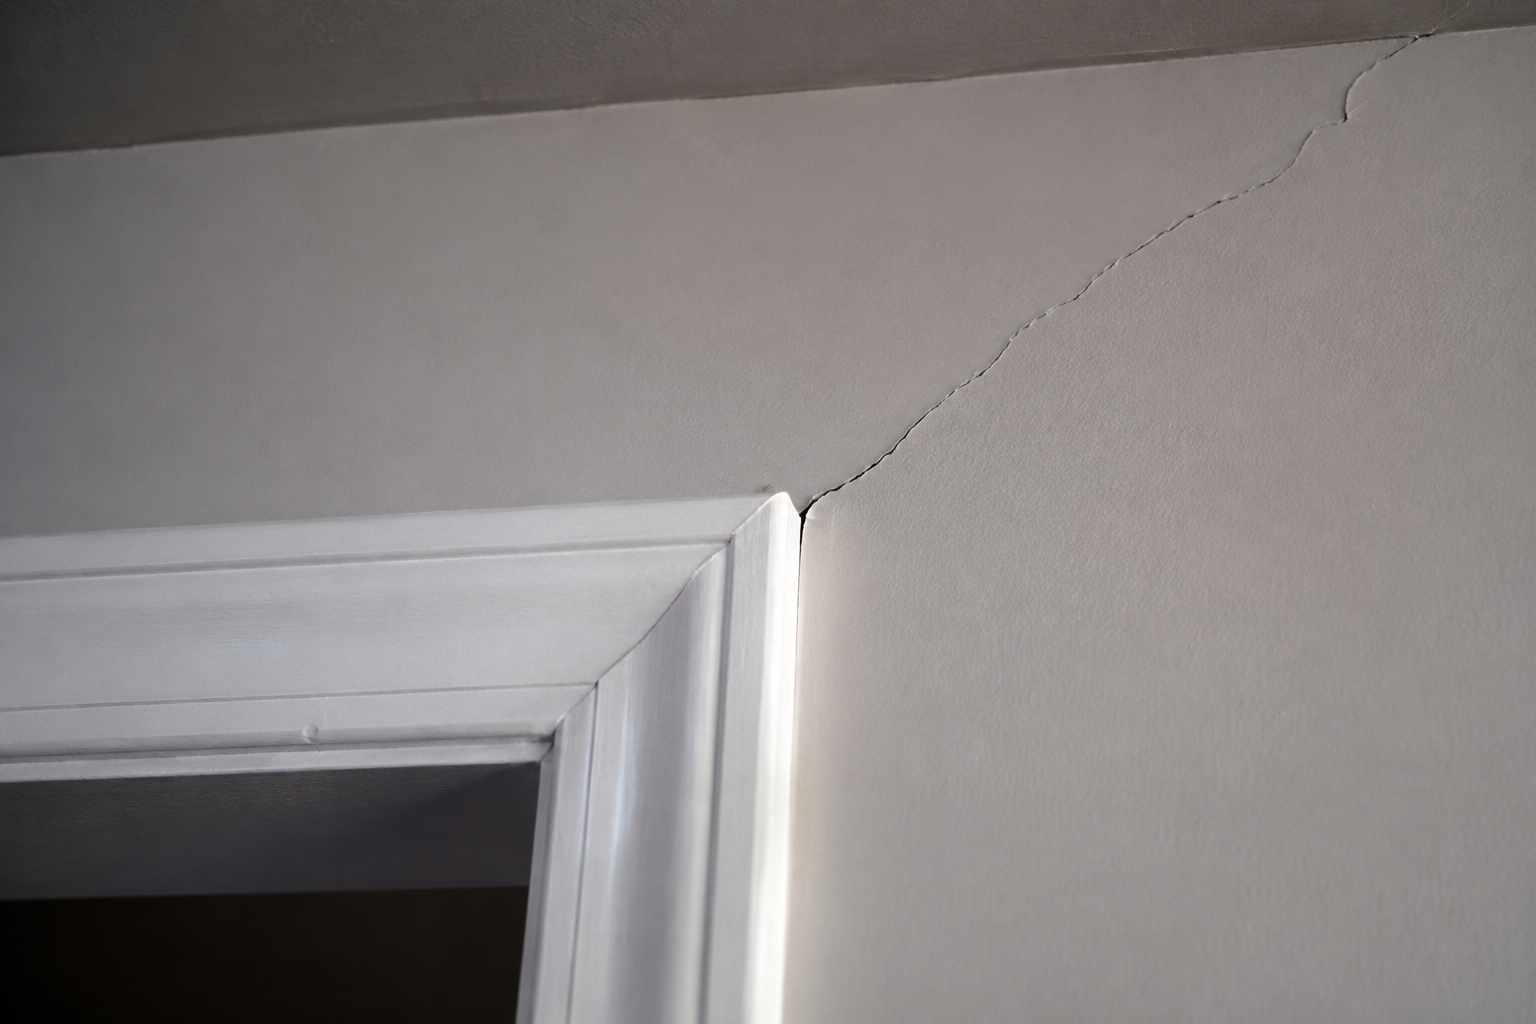
Drywall damage is one of the few household problems where the visible size of the fault tells you almost nothing about how serious it is. A four inch hole from a doorknob is trivial. A hairline crack the width of a pencil line running diagonally from a window corner can mean the house is moving. Learning to tell them apart is genuinely useful, because it decides whether you spend an afternoon and twenty dollars or make a phone call.
What follows is the five categories that account for nearly all residential drywall damage, what each one actually means, and where the line sits between a homeowner job and a trade job. Read it before you search for anyone to repair drywall near me, because two of the five categories are genuinely worth doing yourself and one of them is a structural question wearing a cosmetic disguise.
One. Nail pops and screw pops
These look like small round bumps or discs, often with a hairline ring around them, appearing in rows up a wall or across a ceiling. The fastener holding the drywall to the framing has backed out slightly, pushing the compound above it off the surface.
The cause is almost always the framing drying and shrinking. Lumber arrives with moisture in it, gives that moisture up over the first year or two, and shrinks across the grain as it does. The fastener stays where it is relative to the drywall while the wood moves, and the head ends up proud.
This is genuinely benign. A scattering of nail pops in a house a couple of years old is normal and expected. It is also the easiest repair on this list. The correct method is not to hammer the nail back, which achieves nothing lasting, but to drive a new screw an inch or two away into the same framing member, then remove or set the offending fastener, then fill both.
Anybody who is reasonably handy can do this. The only common mistake is over filling, which produces a visible mound that catches light forever.
Two. Cracks, and the two kinds
Cracks are where the diagnosis actually matters, because two things that look similar have completely different meanings.
Seam cracks run along the joints between sheets, so they appear as long straight lines, usually vertical or horizontal, sometimes with the paper tape visibly lifting. These are a finishing or movement problem in the drywall itself. Common causes are tape that was applied over insufficient compound and never bonded, seasonal humidity movement, and ordinary building settlement. They are cosmetic and fixable.
The repair is to cut out the failed tape entirely rather than fill over it, re tape with mesh or paper, and refinish. Filling over loose tape is the most common mistake and it fails within a year every time.
Stress cracks run diagonally, and they start at the corners of openings. A crack running up and out from the top corner of a door or window is the classic. This is where the sheet is weakest, and it is where movement in the structure concentrates.
A single small diagonal crack at one door corner in an older house is usually nothing more than normal movement. Several of them, in the same direction, growing over time, accompanied by doors that have started sticking or floors that have developed a slope, is a different conversation. In parts of inland Southern California where expansive soils and seasonal moisture swings are common, foundation movement is a real phenomenon and drywall is frequently the first place it becomes visible.
The rule is straightforward. Patch a crack, mark the date, and look at it in six months. A crack that stays closed was movement that has finished. A crack that reopens in the same place is telling you the structure is still moving, and repairing the drywall again is treating a symptom.
Three. Holes
Holes divide by size and the divide is at about six inches.
Small holes, up to roughly the size of a doorknob strike, are handled with a self adhesive mesh patch or a California patch, and are a straightforward homeowner job. The finished result depends almost entirely on how wide the compound is feathered and how well the texture is matched afterward, which is the part people underestimate.
Larger holes need a backing and a piece of new board. The correct method is to cut the opening to a clean rectangle, ideally out to the centers of the studs on each side so the new piece has something to fasten to, or to add wood backing behind the existing board if cutting to studs is impractical. Then a new piece, screwed, taped on all four sides, and finished in three coats over a span wide enough that the patch is not a visible plateau.
The point at which people call somebody is usually the finishing rather than the carpentry. Fitting the board is easy. Making it disappear is not.
Before cutting into any wall, check what is behind it. Electrical cable, plumbing and gas lines all run in walls, and a reciprocating saw plunged into a wall cavity is how a small repair becomes an expensive one.
Four. Water damage
Water damage is the category where the visible mark is the least useful part of the information. A brown stain on a ceiling is not the problem. It is a record of where water ended up, and the source is frequently several feet away and higher.
The critical distinction is whether the board is still structurally sound. Drywall that got damp and dried, and is still firm and flat, can often be sealed with a stain blocking primer and repainted. Drywall that is soft, crumbling, sagging, or has lost its bond between the paper and the core is finished and has to come out. Pressing on it with a thumb tells you within a second which one you have.
Anything beyond a small isolated stain deserves professional attention for two reasons that have nothing to do with the drywall. The first is that the leak has to be found and stopped, and the water arriving at a ceiling stain frequently entered the building somewhere else entirely. The second is what is behind the board. Wet cavity insulation stays wet for a very long time, and wet framing plus warm conditions grows mold within about forty eight hours. A stain that gets painted over with a sealed cavity behind it becomes a much larger problem quietly.
Anyone searching for someone to repair drywall near me after a leak should be prepared for the answer to involve opening more of the wall than the stain suggested, and should be suspicious of anyone who proposes to simply prime and paint it without looking behind.
Five. Corner bead damage
Outside corners take physical abuse from furniture, vacuum cleaners, luggage and traffic, and the metal or vinyl bead underneath dents or separates. The compound over it cracks off in flakes and the corner ends up ragged.
Small dents in the compound over an intact bead fill easily. A bead that has actually been bent or pulled loose has to be cut out and replaced, because compound applied over a loose bead will crack off again at exactly the same rate.
The replacement is not difficult but it does need the bead to be properly fastened and set true, and the finishing along a corner is unforgiving because the eye follows a straight line and sees any deviation in it.
The dividing line
The honest summary is that the carpentry side of drywall repair is accessible to most homeowners, and the finishing side is a skill that takes real practice. Cutting a rectangle and screwing in a patch is easy. Feathering compound over a wide enough area, sanding without gouging, and matching a texture so the repair vanishes is the part professionals get paid for.
Call somebody when the damage is water related, when a crack keeps returning, when the repair is on a ceiling, when the wall has a texture that has to be matched, or when the area is large enough that a visible patch would be worse than the original damage. Handle nail pops, small holes and minor corner dings yourself, and take the time to build the compound out wider than feels necessary, because that single habit is what separates a repair you can see from one you cannot.
Need help in Riverside?
Call (951) 219-6582